Files panel and importing
The Files panel shows your workspace's files next to the page you're writing: PDFs, Word documents, images, text and code, and audio and video. Use it to read a source while you write, highlight what matters and link your notes to the exact spot. This page also covers bringing files into Hillnote: dropping them on the window, importing many at once, letting AI organise them, and clipping web pages.
Open files beside a page
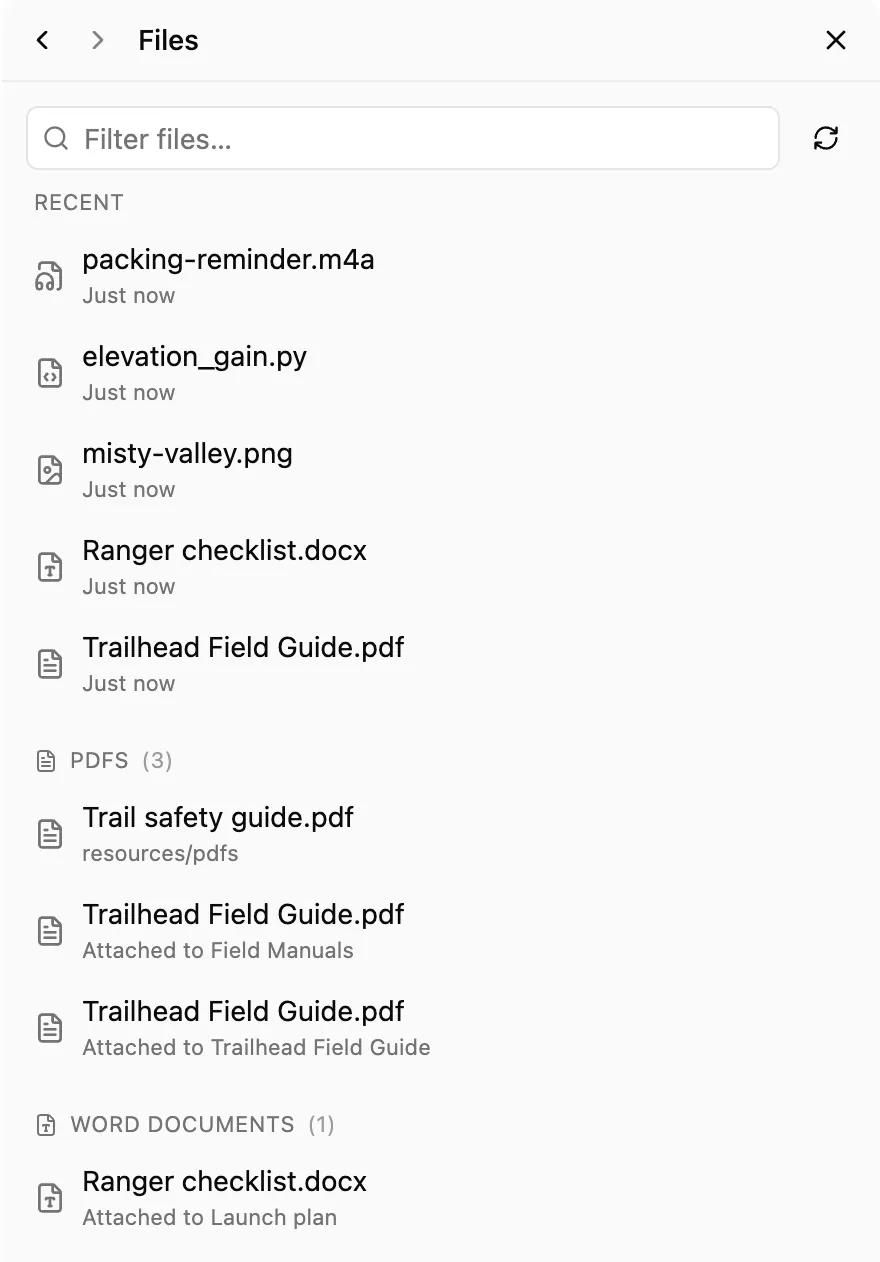
Click Files in the top bar to open the panel beside your page. No button? Look in the top bar's ⋮ menu, or turn on Files in Settings ▸ Editor. To give the panel a whole tab instead, choose Files in the sidebar's Panels group (see App interface).
The panel's home lists your Recent files, a Filter files… box, and the workspace's files grouped by kind (PDFs, Word documents, Images, Text & code and Audio & video), each with the page it's attached to.
The header's back and forward buttons step through the files you've opened. Once a file is open, the header adds All files, which takes you back to the list, Copy link to file, Show in Finder (Show in File Explorer on Windows) and Open in default app. For PDFs and Word files it also has Add to library… (see Library).
Viewers
Each kind of file opens in its own viewer:
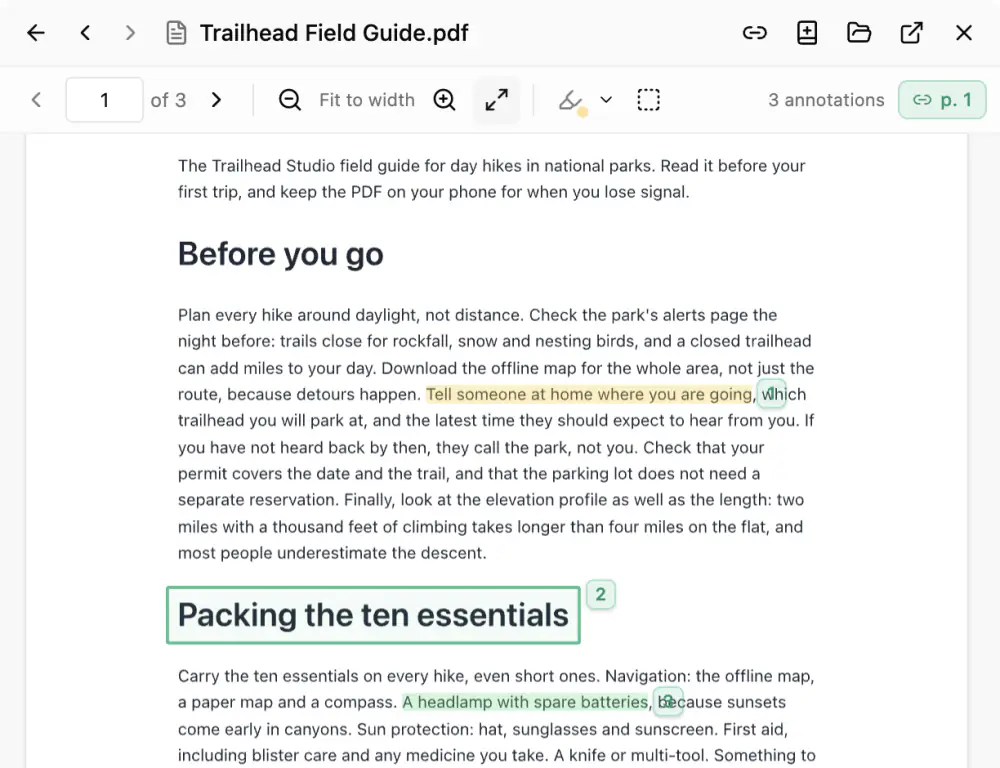
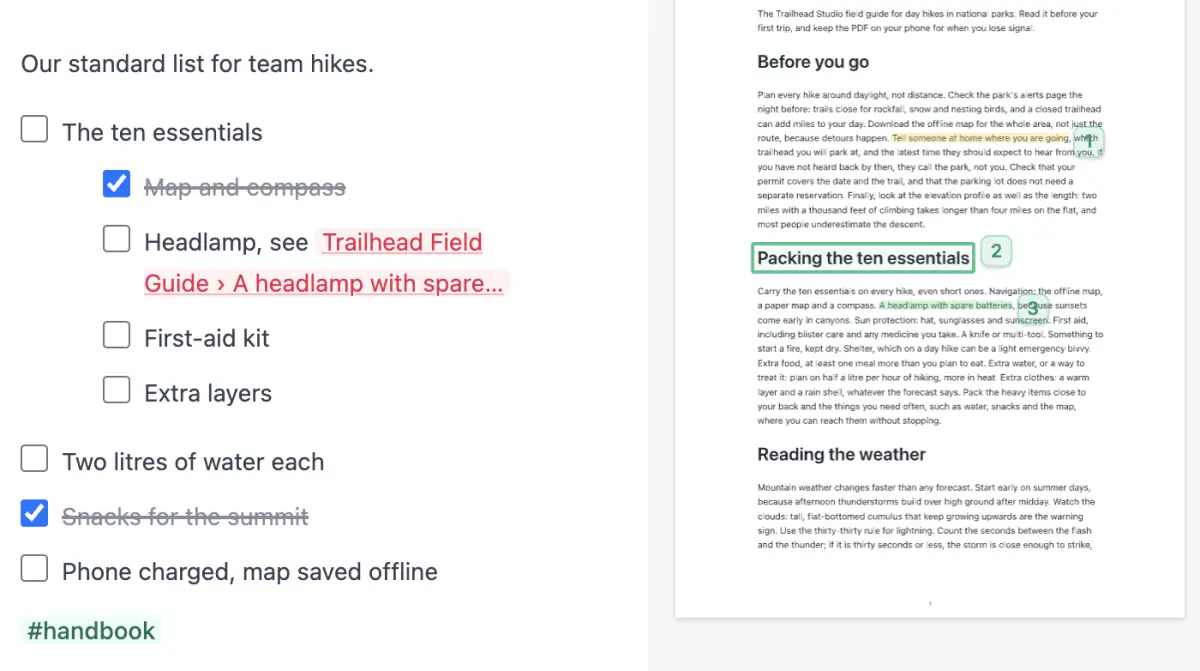
- PDF: page through, zoom, Fit to width and Outline. Select text to highlight it in Yellow, Green, Blue or Pink, or click Draw a box to link to a region and drag on the page (Esc cancels).
- Word: Outline; select text, then click Cite passage.
- Text and code: select lines, then click Link lines ….
- Audio and video: click Link … to link to the current moment.
- Images: draw a box to link to part of the picture.
Link to an exact spot
Every highlight, box and cited passage gets a numbered badge. Drag the badge into your page to place a link, or click it to copy the link. In a PDF, Link to this page links the whole page. Clicking the link later opens the file at that spot. For links between pages, see Links and topics.
To link a file from the editor, type @ or [[ and use the Files tab. Import file… there copies a file from your computer into the workspace.
Highlights live in a small hidden file next to the original, so the original never changes. Delete annotation removes one.
Drop files to import them
Drop files onto the Hillnote window:
| File | Becomes |
|---|---|
.md, .txt | a page |
PDF, Word, Excel, HTML, XML, Jupyter notebook, .zip | a Markdown page in the Imports folder, with the original attached |
.csv, .tsv | a sheet |
| long PDFs, EPUBs | an offer to add them to a library |
Images dropped on their own go to Chat instead (see Chat with AI). Converting documents is desktop app only.
Import many files at once
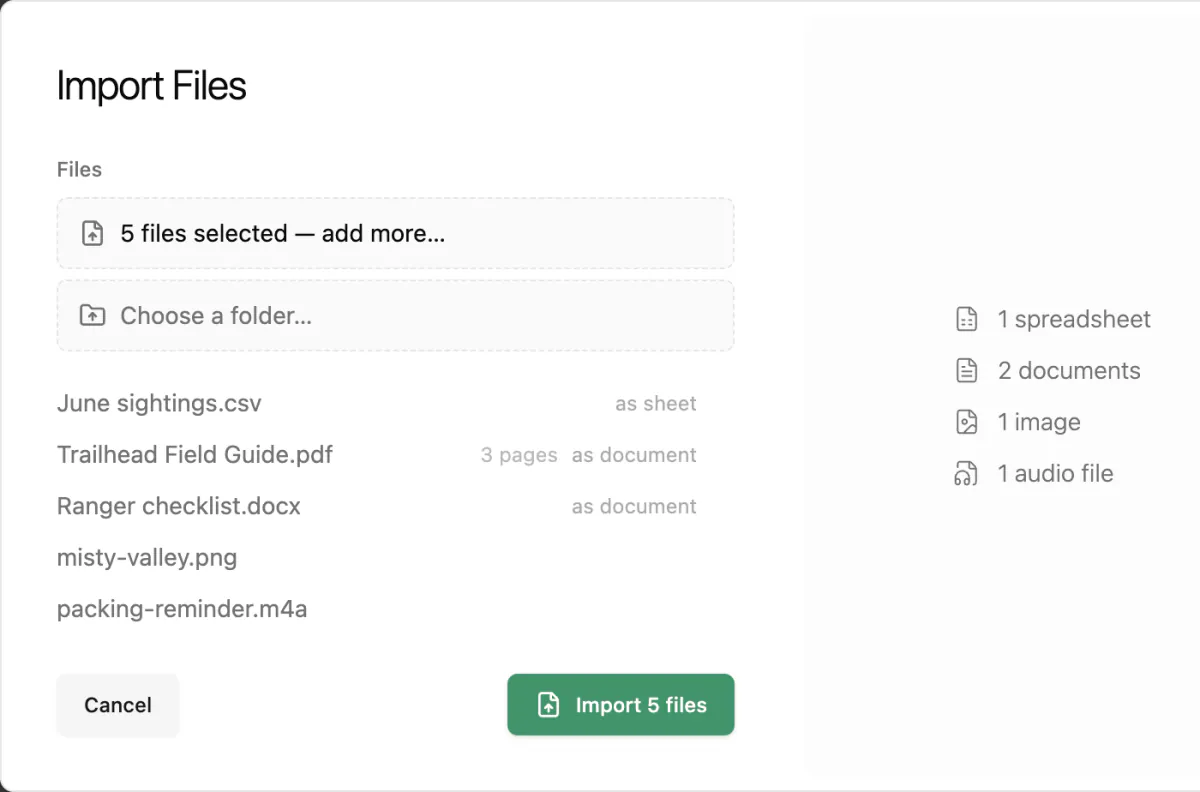
Click the workspace name at the top of the sidebar, then Import Files.
- Click Choose files… or Choose a folder…. Folders keep their structure, and links between the notes inside keep working. Images stay with the notes that use them.
- Check the list. Spreadsheets can come in as sheet or as markdown, and long documents as volume or as document.
- Click the import button, which counts the files (Import 5 files, for example).
Images are read with on-device text recognition. Audio is transcribed on this device, unless you allow cloud transcription for recordings over 10 minutes, which is faster and billed in credits per minute of audio (see Dictation and voice). Files over 500 MB are skipped. A folder that is itself a Hillnote workspace can't be imported: open it from the workspace switcher instead.
Auto Organise
Auto Organise lets AI tag, summarise and file documents into a structure. To start it, click Organise these now after an import, choose Auto Organise in the menu under the workspace name, or choose Auto organise… on a folder in the sidebar.
- Under What to organise, choose Everything or pick folders, then click Continue.
- If you like, add Instructions and Topics, and some Context: an Organisation Philosophy page that says how you like things organised, or reference documents.
- Pick a Destination: Top level, Folders, Section or Database. Database rows are tagged in place, never moved.
- Pick an Engine. Built-in AI shows a credit estimate first; CLI agent runs in your terminal, in the desktop app (see Agents in your workspace).
- Click the organise button, which counts the files (Organise 12 files, for example).
There's no review step. Auto Organise tags and summarises the files, plans a folder structure and moves the files as it runs, then reports what it did. Open destination takes you to the result. If credits run out, the run pauses until you click Resume. For other ways to keep your workspace tidy, see App interface.
Clip web pages
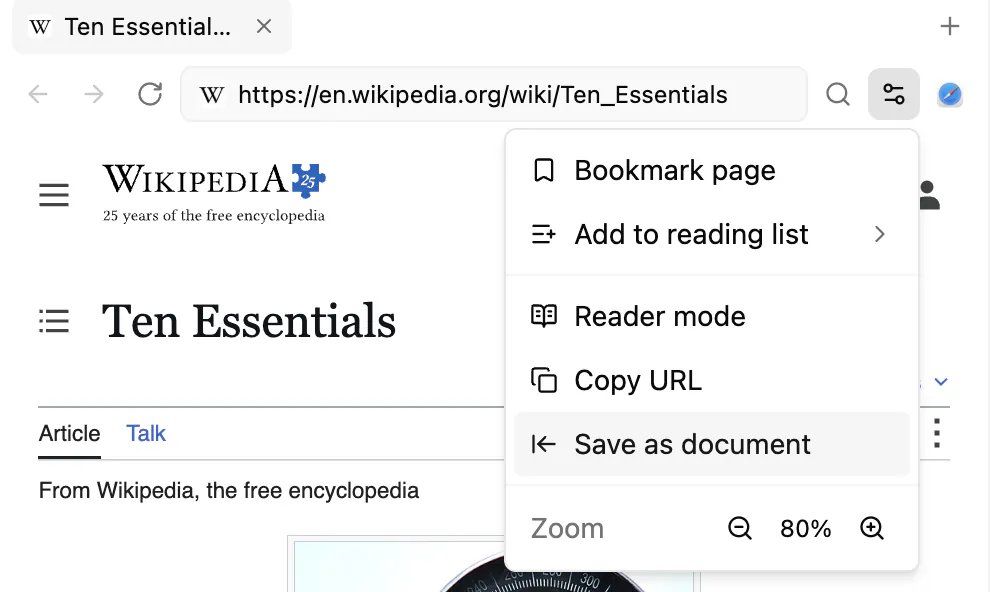
- In the Browser panel, which you open from the top bar, open the page's options menu and choose Save as document. The page is saved as Markdown in the Imports folder and opens.
- In the Quick Menu ▸ Quick Note, click Clip a webpage and paste a URL to add the page's text to your note. Hillnote can also offer the page that's open in your browser: click Clip. See Quick capture.
Both are desktop app only.