Dictation and voice
Talk instead of typing. Dictation turns what you say into text in any page: you choose the engine that turns speech into text, and how AI tidies it afterwards. Voice mode goes further. It's a spoken conversation with Hillnote, which does what you ask and answers out loud.
Dictate into a page
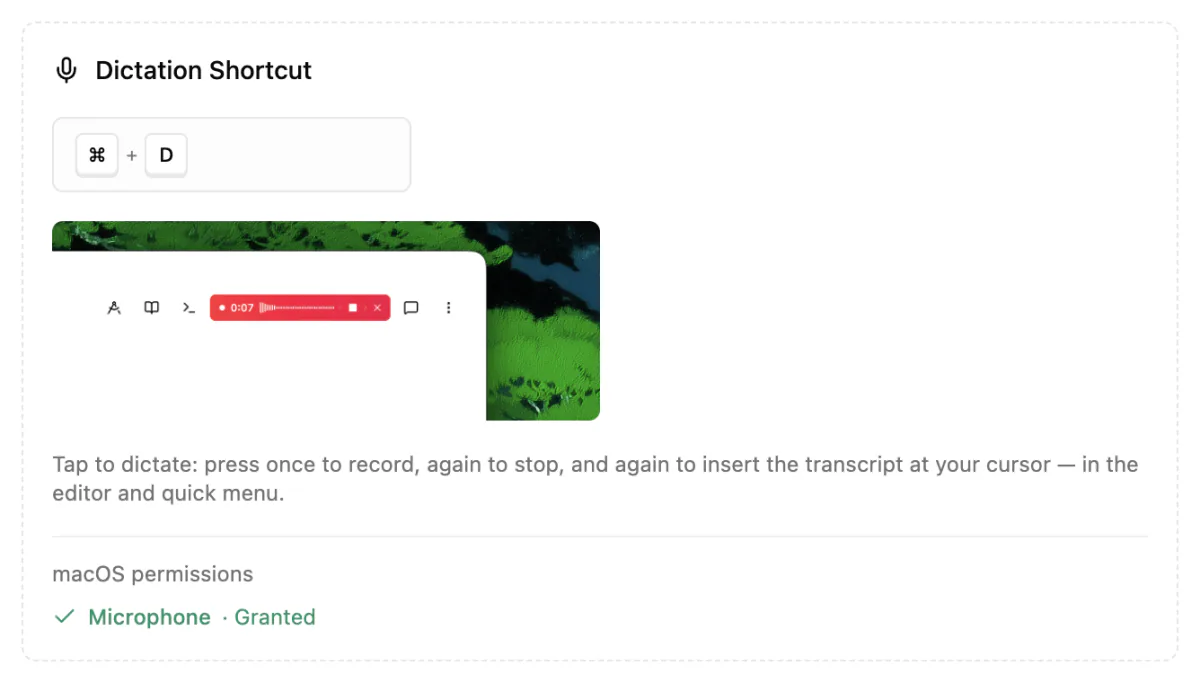
Press ⌘D, or Ctrl+D on Windows, to start recording. Or click the microphone in the top bar: it's Record & transcribe, under More tools unless you've pinned it.
- Speak. The top bar shows the recording.
- Press ⌘D (Ctrl+D) again, or click Stop & transcribe.
- Press ⌘D (Ctrl+D) once more, or click Insert recording. The audio and its transcript go in at your cursor.
With no page open, the button says New note instead, and the transcript becomes a note in the Recordings folder. The chevron beside it (Style & settings) has Save to new note instead, and Discard this recording (the ✕) throws the recording away.
To record straight into one spot, type / in a page and choose Record.
Transcription engines
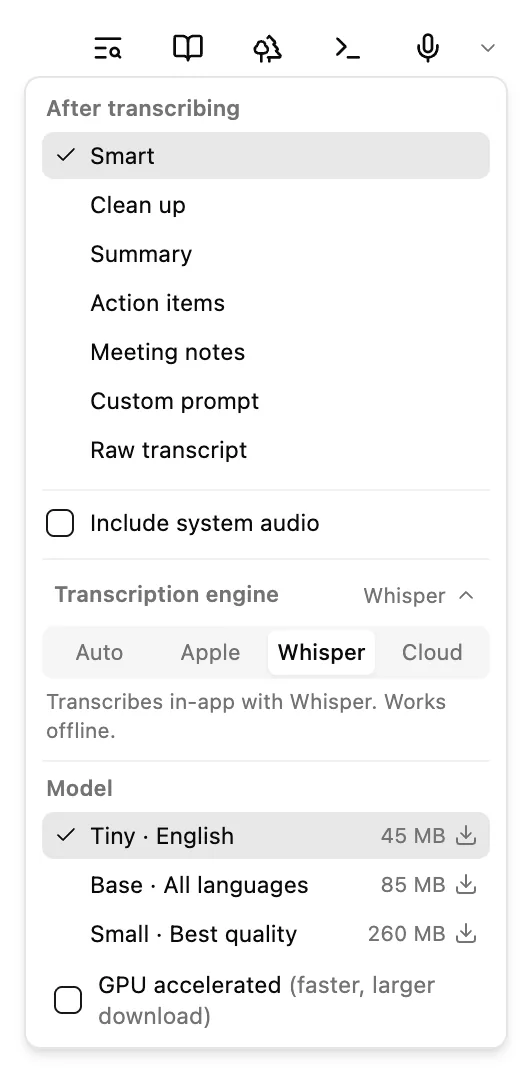
To choose an engine, hover the microphone in the top bar and click the chevron beside it (Transcription settings). If the microphone is under More tools, the Style & settings chevron on a finished recording opens the same menu.
- Auto uses Apple's on-device speech on Macs that have it, and Whisper otherwise. Audio stays on your computer, except that with Whisper, recordings over 10 minutes go to the cloud if you're signed in.
- Apple and Whisper work offline, in the desktop app only. Whisper has three models: Tiny · English, Base · All languages and Small · Best quality. GPU accelerated is faster, but a bigger download.
- Cloud is the most accurate. It uploads your audio, uses credits and takes recordings up to 30 MB.
Include system audio also records what's playing on your computer, such as a call. For what stays on your computer and what doesn't, see Privacy and your data.
Tidy transcripts with AI
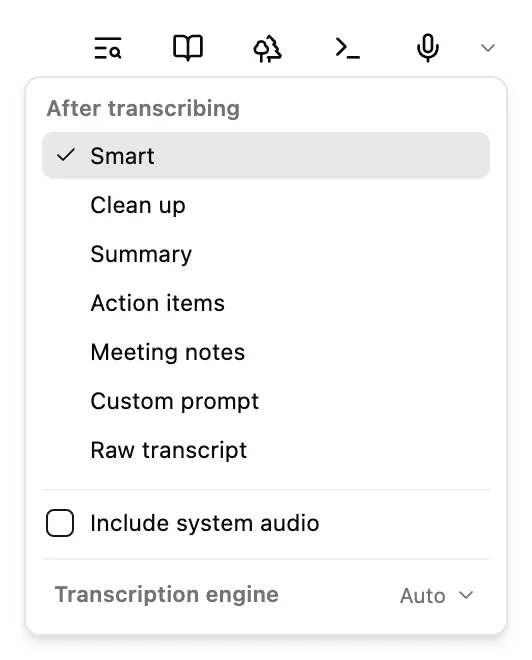
Under After transcribing, in the same menu, pick what AI does with the text:
- Smart (the default) cleans it up and adds structure when it's useful.
- Clean up fixes punctuation and paragraphs, keeping every word.
- Summary, Action items or Meeting notes put the key points, tasks or decisions first.
- Custom prompt follows your own instruction.
- Raw transcript inserts exactly what was heard.
Tidying uses free on-device AI when it can (see Local models), and a cloud model for very long recordings if you're signed in. If no model can help, you still get the raw transcript. Clean up with AI in the notice then has Chat turn it into meeting notes.
Buttons and shortcut
- Change the key: open Settings ▸ Hillnote and use Dictation Shortcut. That page also lists the macOS permissions each shortcut needs, such as Microphone.
- Hide the button: Microphone Button in Settings ▸ Editor hides the top bar microphone. The shortcut still works.
- Transcribe an audio file: add it with
/Audio, then click Transcribe on the block. Transcription style picks how it's tidied. - Record from anywhere: the Quick Menu can record too, even while another app is in front. See Quick capture.
Every default key is listed in Keyboard shortcuts.
Talk to Hillnote
Voice mode is a spoken conversation. Hillnote hears you, does the work with the same tools as Chat, and answers out loud.
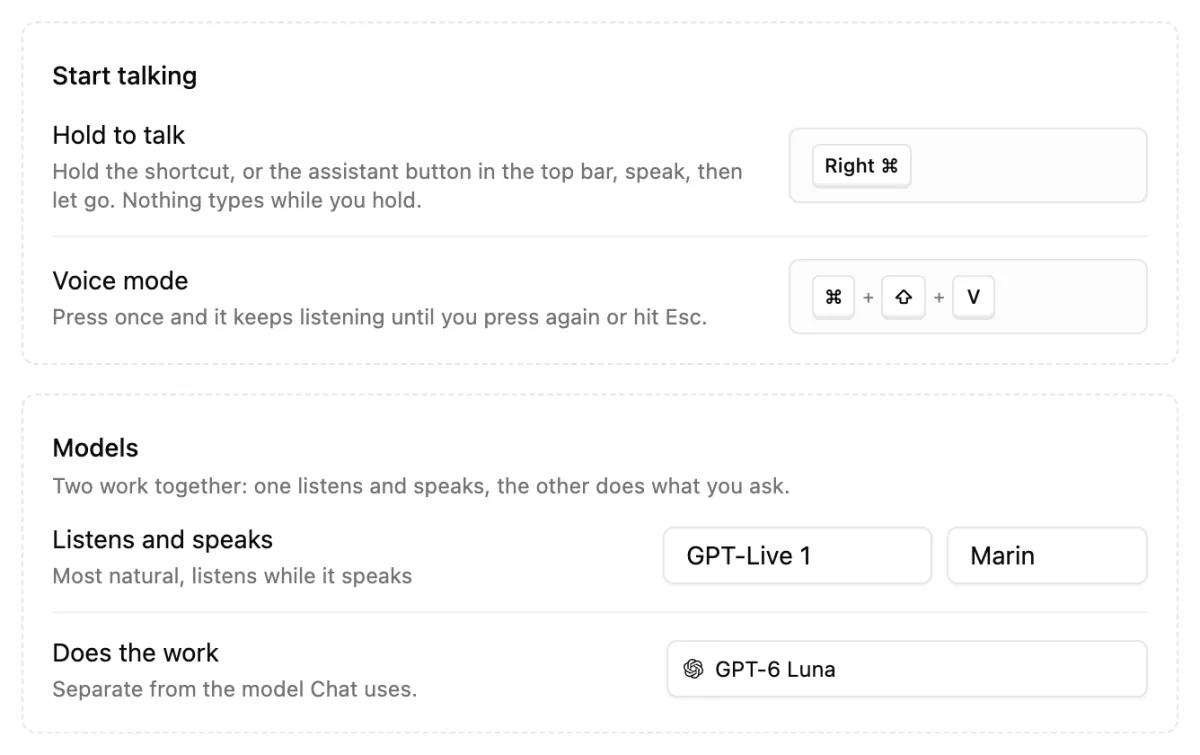
- Hands-free: press ⇧⌘V, or Ctrl+Shift+V on Windows, or tap the assistant button in the top bar (Assistant mode, under More tools unless you've pinned it), then talk. It listens until you press the shortcut or tap the button again, or press Esc.
- Hold to talk: hold the right Command key on a Mac (right Control on Windows and Linux), speak, then let go. Holding the assistant button does the same. To follow up, hold the key again within a few seconds.
Voice mode can open panels, search, type where your cursor is, and read or edit notes, collections, sheets and tasks. Its edits follow Chat's Review edits setting (see Chat with AI), and it can't delete documents. While a session is live, Mute microphone and End (Esc) control it.
Assistant Button in Settings ▸ Editor hides the top bar button. The shortcut still works, and the button comes back while a session is live.
Voice settings
Set voice mode up in Settings ▸ Voice:
- Start talking changes the Hold to talk and Voice mode shortcuts.
- Models: Listens and speaks sets the voice model and how it sounds. Does the work picks the model that carries out your requests; Auto chooses one for each request.
- Who runs the voice session: Hillnote cloud needs you signed in. It uses your credits while a session runs, billed by the second, and the setting shows its rate per minute. In the desktop app you can choose Your own OpenAI key instead, stored encrypted on your computer. The voice session then runs on your OpenAI account, and the model that does the work is billed as usual.
- Show voice levels next to the cursor adds small lines by your pointer while you talk and while it answers.
How many credits each plan includes is on the pricing page.
Use voice outside Hillnote
This is in the desktop app only, on macOS and Windows. Turn on Use outside Hillnote in Settings ▸ Voice to hold the same key anywhere on your computer, even with another app in front.
On a Mac, Hillnote needs Accessibility access: click Open System Settings and turn Hillnote on. Run self-test checks that Hillnote hears the key.
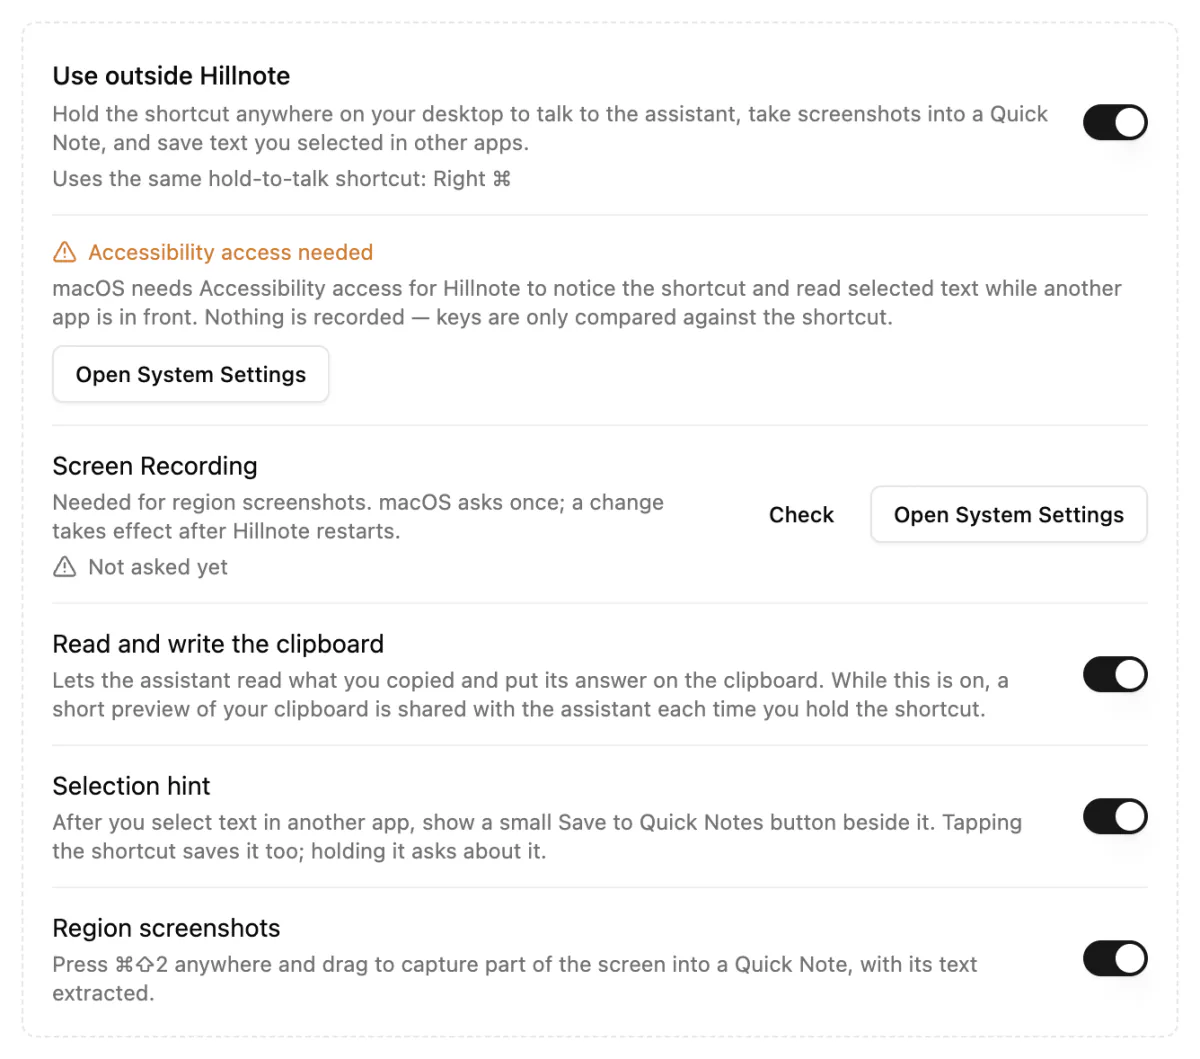
This also unlocks three more switches:
- Selection hint saves text you select in other apps to Quick Notes.
- Region screenshots captures part of the screen into a quick note. On a Mac, it needs Screen Recording access too: macOS asks once, and a change takes effect after Hillnote restarts.
- Read and write the clipboard lets the assistant read what you copied and put its answer on the clipboard. While it's on, a short preview of your clipboard is shared each time you hold the key.
More on capturing from other apps in Quick capture.