Automations
Hillnote can do some of your work for you. Triggers run an agent or a plugin when something happens in a workspace, or on a schedule. Recurring tasks reset themselves, board cards move at the time you set, routines run AI tasks on Hillnote's servers, and recipes save the AI requests you use often.
Triggers
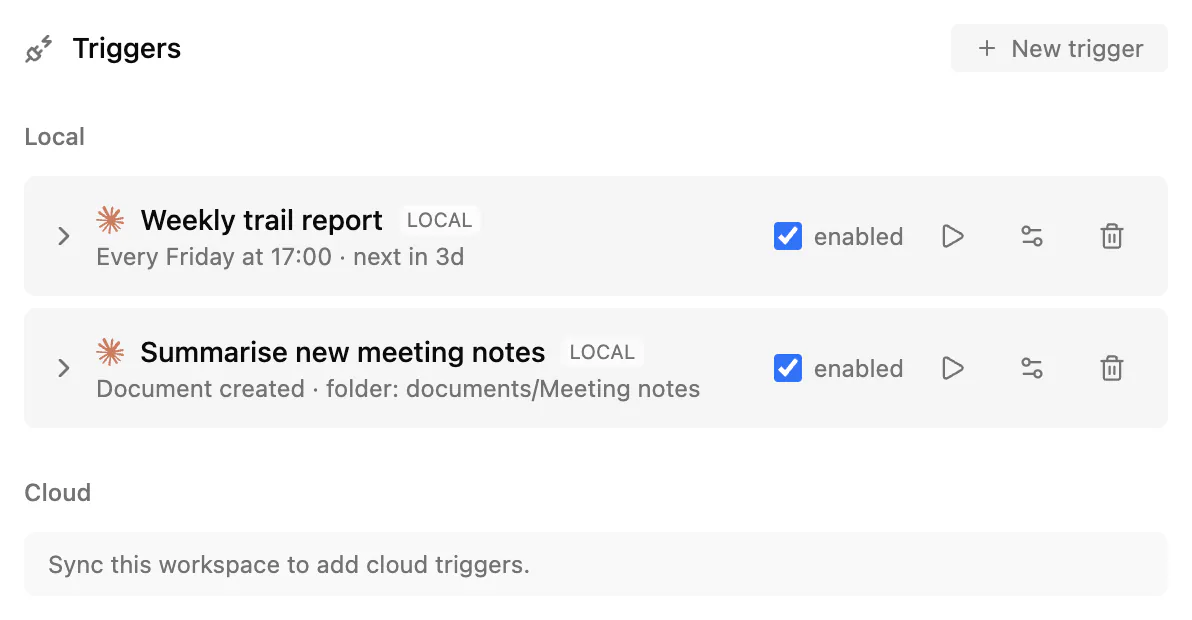
A trigger does something when an event happens in a workspace. To see your triggers, click the workspace name at the top of the sidebar and choose Triggers.
- Local triggers run on this computer as soon as the event happens, without sync. They're desktop app only: the web app at app.hillnote.com doesn't have them.
- Cloud triggers run on the server after a sync push. Only the owner of a synced workspace can manage them.
Each trigger has an enabled checkbox, Test fire, and edit and delete buttons. Local triggers also list their recent runs.
Create a trigger
- Click New trigger and enter a Name.
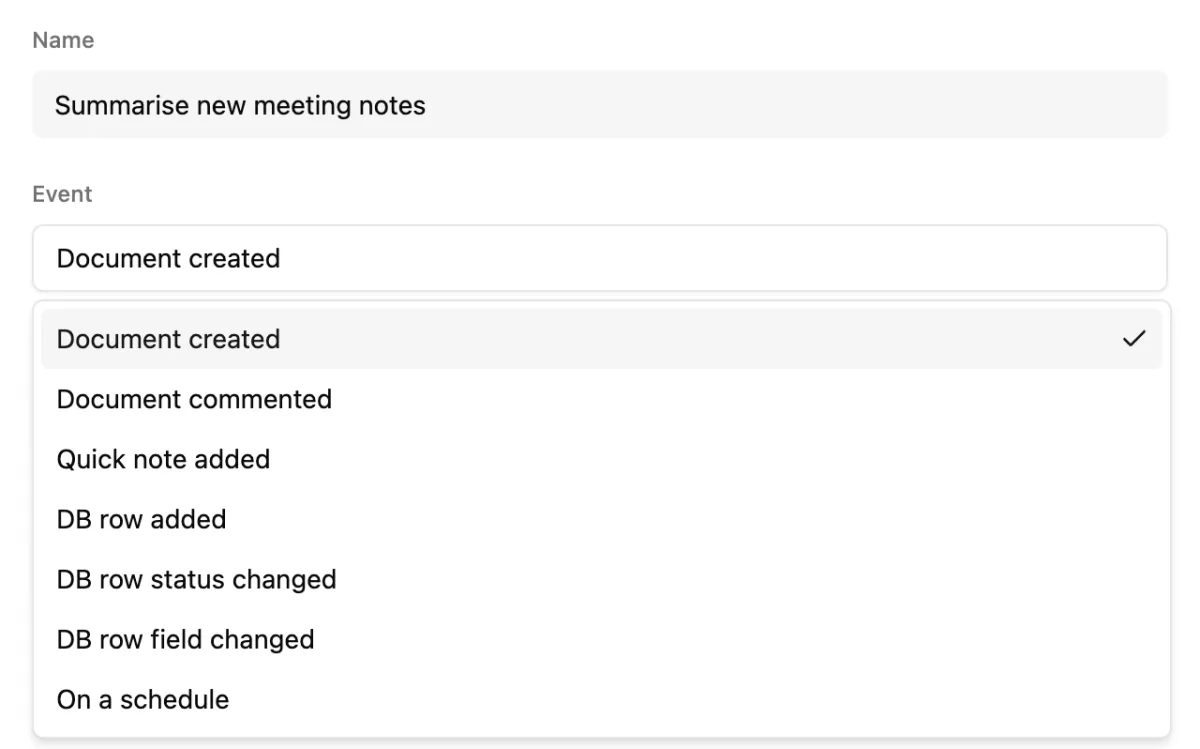
- Pick an Event: Document created, Document commented, Quick note added, DB row added, DB row status changed, DB row field changed or On a schedule.
- Narrow the Scope to a folder or file, a database, or one field.
- Pick an Action:
- Run a local CLI tool starts an agent CLI in a floating terminal with your Instructions. It offers the CLIs switched on under Mention CLIs in Settings ▸ AI. See Agents in your workspace.
- Send to a plugin passes the event to a background plugin. See Plugins in Tools.
- Auto organise the document tags, summarises and files the new page, using credits. See Auto Organise in App interface.
- Fire a Hillnote routine makes it a cloud trigger that runs a routine (see Hillnote Routines below).
Describe it instead
Rather than fill in the form yourself, type what you want into Describe it and click Pre-fill form (⌘↵, or Ctrl+Enter on Windows). If more detail is needed, you get a question. Type your answer and click Answer, or click Skip and finish the form yourself. Check the result before you save.
In the desktop app, a local model does this, so Ollama must be running with a model installed (see Local models). On the web, a cloud model does it and uses credits.
Run on a schedule
Scheduled triggers are desktop app only.
- Choose On a schedule as the Event.
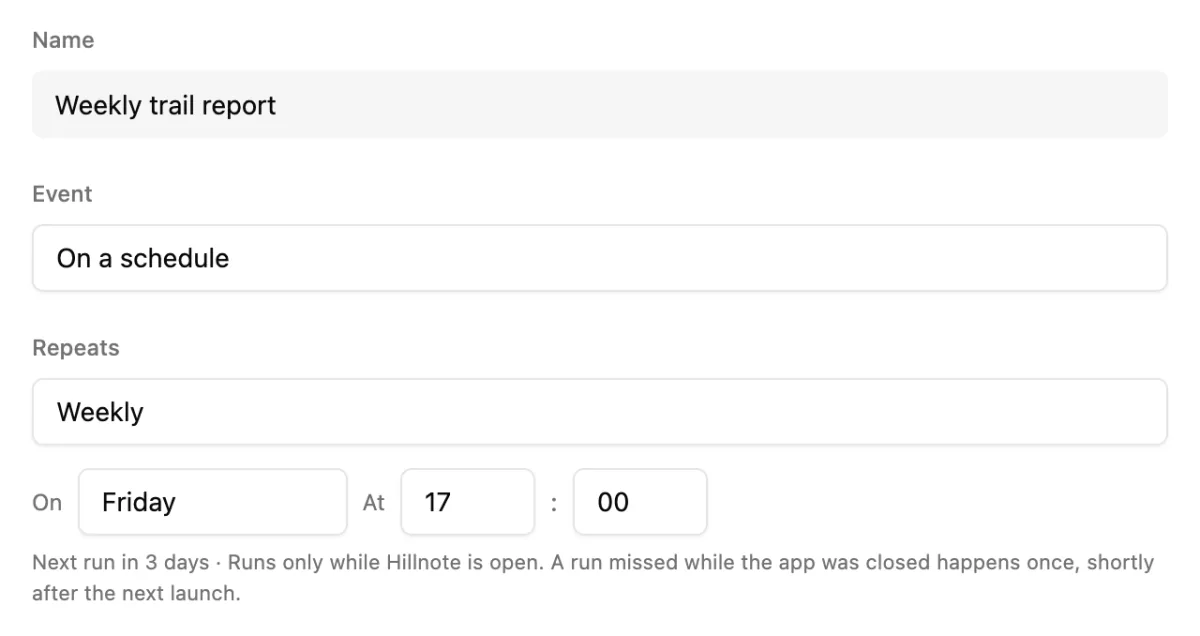
- Pick how often it Repeats, from every 15 minutes up to Daily, Weekdays (Mon–Fri) or Weekly.
- For those last three, set a time in At. For Weekly, also pick a day in On.
A scheduled trigger can only run a local CLI tool or send to a plugin. It runs only while Hillnote is open. A run missed while the app was closed happens once, shortly after the next launch.
Recurring tasks
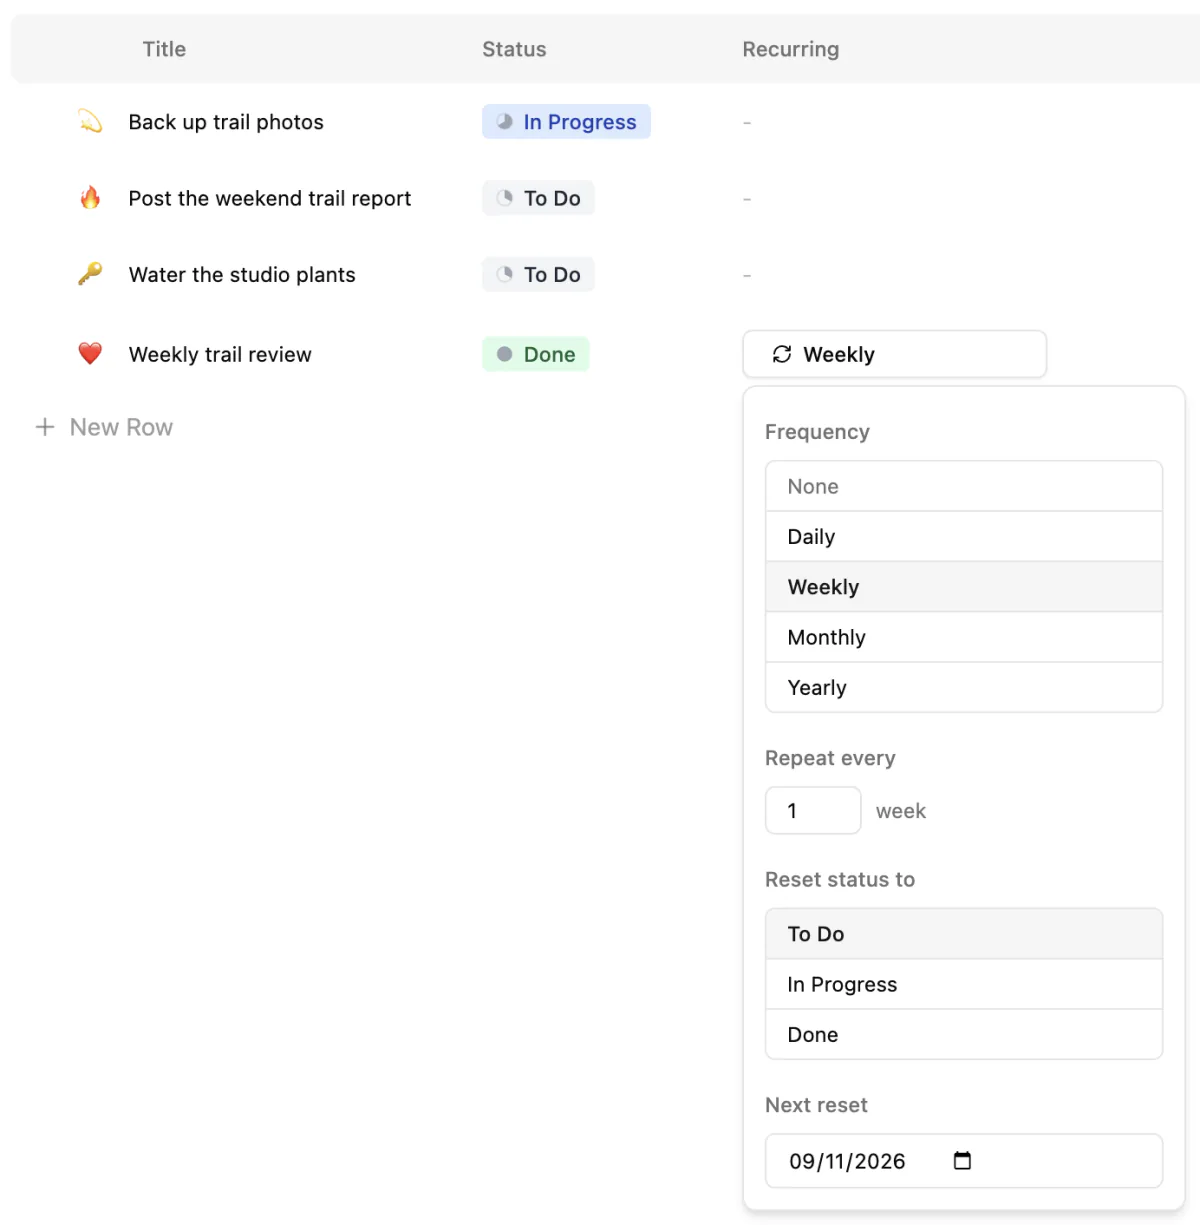
Tasks can repeat, like a weekly review.
- In a collection with a Status column, add a Recurring column. For collections and columns, see Database.
- Click a task's cell in that column, then Set recurring....
- Pick a Frequency and Repeat every. Daily tasks can run Only on days you pick. Monthly ones run on a date or on a weekday, such as the first Monday.
- Choose what to Reset status to. Next reset shows the date, and you can change it.
Open the collection on or after that date, and finished tasks go back to that status and get their next date.
Scheduled board moves
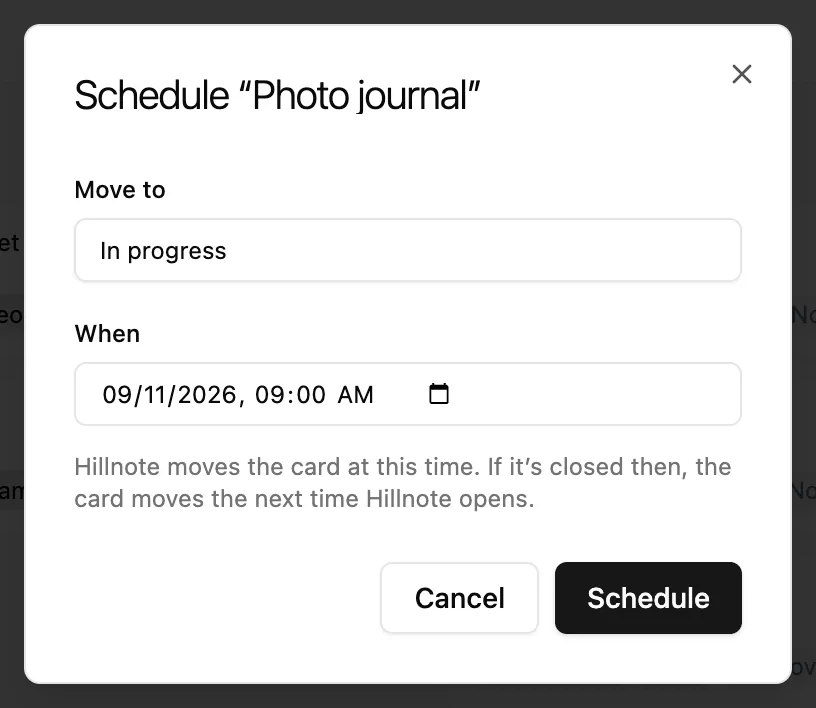
Scheduled and automatic board moves are desktop app only. To move a card later:
- On a board grouped by a status or select column, open a card's ⋮ menu and choose Schedule move….
- Pick a lane in Move to and a time in When, then click Schedule.
If Hillnote is closed at that time, the card moves when it next opens. Once a move is scheduled, the card's menu offers Reschedule move… and Cancel scheduled move.
Lanes can also move cards on their own. In Manage columns ▸ Agents ▸ Status automation, set Auto-move to a lane, right away or after a delay. Scheduled moves lists what's queued. To have a lane hand its cards to an agent, see Agents in your workspace.
Hillnote Routines
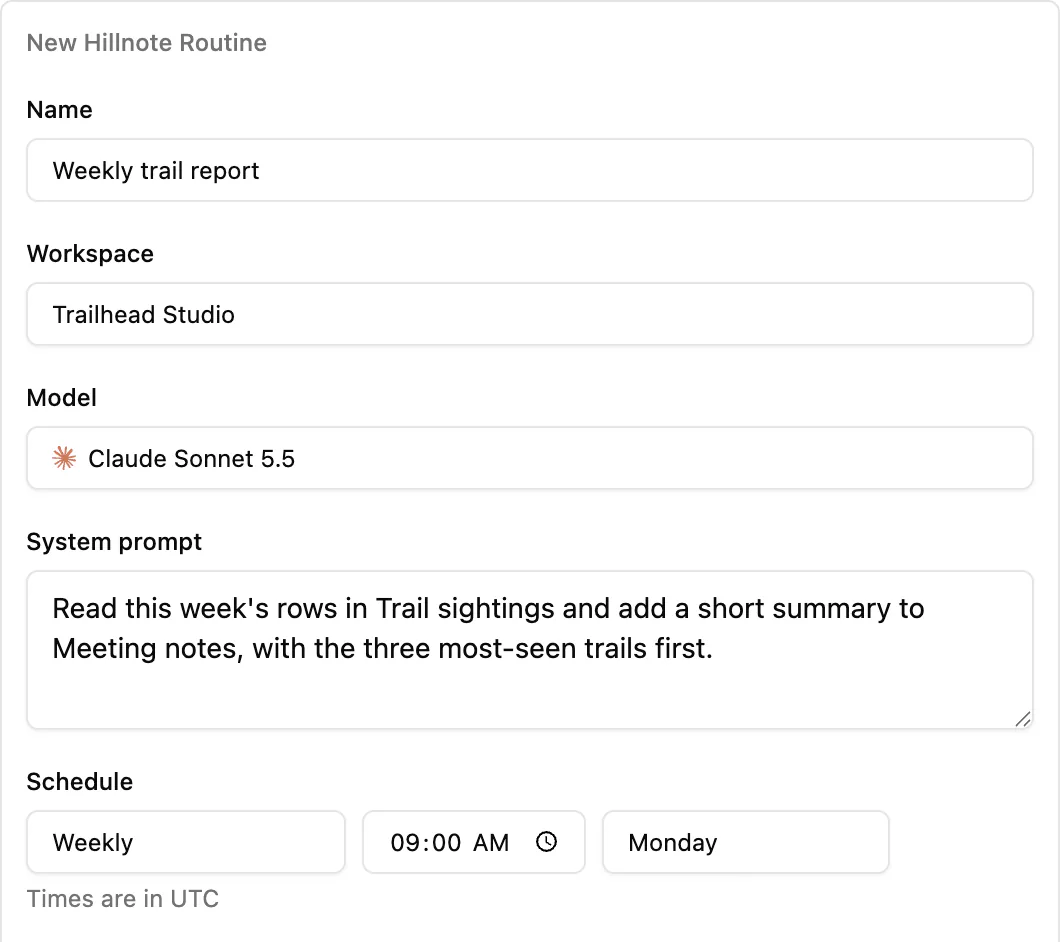
A routine is an AI task that runs on Hillnote's servers against a synced workspace, so your computer can be off. Sync the workspace first: see Sign-in to sync and unlock premium features!.
- Open Settings ▸ Routines and, under Hillnote Routines, click New routine.
- Fill in Name, Workspace, Model and System prompt.
- Pick a Schedule (Manual only, Daily, Weekly or Monthly (1st)) and a Time (UTC). A weekly routine also takes a Day of the week.
- Optionally change Max steps (1 to 25) and Temperature (0 to 2), then click Create.
Turn off Enabled to pause a routine. Run now starts it, and Show run history lists each run's credits. Your plan sets how many routines you can have: see the pricing page.
Recipes
A recipe is a saved AI request you run with /.
- Click the workspace name at the top of the sidebar, then Workspace Settings ▸ Recipes.
- Click New, fill in Command Name, Instructions, any Document References and an Output Format, then click Create.
To use one in a page, type /, pick the recipe, add notes if you like and press ↵ (Enter on Windows). Then send a follow-up or click Accept & insert. In Chat, picking a recipe after / fills the message box (see Chat with AI).
Recipes are saved in the workspace, so agents connected to Hillnote can use them too. See Connect your tools.